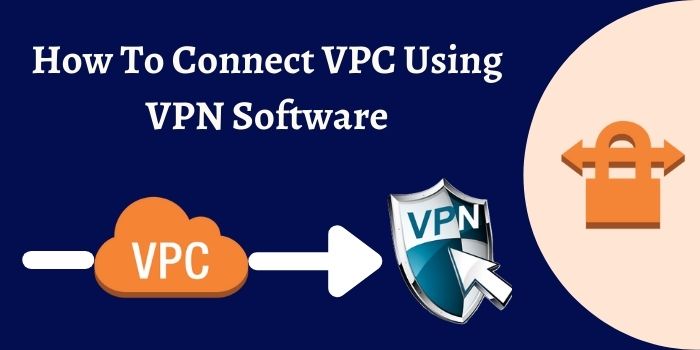
This article will explain the process of how to connect to a VPC (Virtual Private Cloud) using a software VPN. Simply follow the instructions below carefully. After completing all of the steps, you will be able to connect to VPC using VPN software.
What Are VPC and VPN?
A Virtual Private Cloud (VPC) is a secure private network within a public cloud that is hosted on the cloud.
You can launch AWS resources into a virtual network that you define using Amazon Virtual Private Cloud (Amazon VPC). This virtual network functions similarly to a traditional network in your own data center, but it benefits from AWS’s scalable infrastructure.
A VPN, or Virtual Private Network, encrypts and routes all of your internet traffic through a secure connection, preventing others from seeing what you’re doing online and where you’re doing it. A virtual private network (VPN) adds an extra layer of security and privacy to all of your online activities.
Here Are Six Simple Steps To Connect Your VPC Using VPN Software:
1. Set up a Customer Gateway (CGW) that connects to your <firewall ip>.
2. If desired, create a virtual private gateway (VPG) and connect it to the VPC.
3. Connect to a VPN (Virtual Private Network).
4. Create a routing table and assign it to the VPC you’re using to connect to the VPN.
5. Firewall configuration.
6. To examine and test.
To connect VPC using VPN software, carefully follow the steps below:
Step 1: To create a Customer Gateway (CGW):
Customer gateway is an anchor on your side of this connection (CGW). CGW can be either a hardware or a software appliance. On the AWS side of the VPN, the virtual private gateway is the anchor.
- To create a customer gateway, go to the AWS console’s VPC Dashboard and then click the Customer Gateway link near the bottom of the left-hand column.
- Then, under Create Customer Gateway, type the name of the network to which the gateway will connect. In the IP Address field, type the public-facing IP address of the firewall you want to connect to, and then click Create.
Step 2: To create a Virtual Private Gateway (VGP):
On the Amazon side of VPN, VGP is the concentrator. You can create VGP and attach it to the VPC where you want to connect to the VPN.
- The process is the same as Step 1 with one add-on. Click “Create Virtual Private Gateway,” give it a name, and then give it the default ASN setting before clicking Create again.
- Return to the “Virtual Private Gateway” dashboard and choose the newly created VPG. Then choose to Attach it to VPC from the Actions menu, and then select the AWS VPC you want to connect to.
Step 3: To Create a Virtual Private Network(VPN):
The VPN connection process ties the Customer Gateway and the Virtual Private Gateway we created earlier together.
- Select VPN Connection and give it a name. Then, from the first dropdown, choose the VPG you created in the previous step. In the first step, you created CGW using the second drop-down menu and then decided whether you wanted the tunnel to provide dynamic or static routing.
- Selecting Static allows you to open only the IP ranges on your network that the VPN tunnel should be able to access.
Step 4: To create Route tables
A routing table is made up of a set of rules known as routers that determine where network traffic from your subnet or gateway is sent.
- To create route tables, go to the left-hand column and click Route Tables, then create a routing table and select the appropriate VPC. If your VPC requires access to the internet, you’ll need to create an Internet Gateway and connect it to the VPC for which the VPN tunnel is being created.
- In the image of the route table configuration below, the IP range of the local VPC can be seen in the first position with the target set to local. In the second row, there is a wide-open range, and we need to select the IGW we just created as the target. Then, in the Target column, click on the text field, and IGW should fill it in.
- Then, on the local network, add the IP ranges you want the VPN tunnel to access, and point that IP ranges to the VPG you created in the previous step.
Step 5: Configuration of firewall
- Click on VPN Connections, which is located at the bottom of the left column. Select the VPN connection we just created and then click Download Configuration at the top of the screen.
- There will be three dropdowns in the modal that appears: Vendor, Platform, and Software. Every firewall configuration panel is unique to each vendor.
- If you have any doubts about the information requested, find a way to double-check your choices before clicking Download. After logging into the firewall, click System, then Upgrade OS to see the OS version information for your firewall.
Step 6: To check and test
- From the VPN connection, go to the “Tunnel Detail” tab and look at the “status” column in the table. AWS has a connection to your firewall if you see two green-ups.
- You can SSH into one of your instances and ping a machine on your local network to test the connection. Pinging the instances in your cloud from one of your local machines is something I recommend.
- The security groups must be configured so that the instances in the VPC accept traffic on whatever ports or IP range they will be communicating with.
Also Read: Kaspersky vs NordVPN
To Connect VPN Using VPN Software Again:
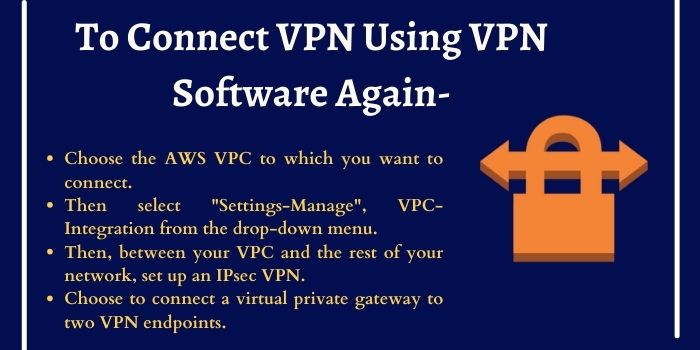
- Choose the AWS VPC to which you want to connect.
- Then select “Settings-Manage“, VPC-Integration from the drop-down menu.
- Then, between your VPC and the rest of your network, set up an IPsec VPN.
- Choose to connect a virtual private gateway to two VPN endpoints.
It can set up a tunnel automatically thanks to AWS.
For connecting multiple VPCs you can follow these steps:
- To transport traffic to your sites, you must first set up a transit gateway, to which you must also connect your VPN clients and VPCs.
- After that, you must create a transit gateway route table with connections to your VPCs.
- By creating a list, you can also associate your VPN connection with another transit gateway route table.
- Then, from your VPC and VPN, add routes to both route tables.
Conclusion
We’ve gone over how to connect a VPC using VPN software in a straightforward manner. Follow each step carefully to ensure that it works. We also covered how to use simple methods to connect multiple VPCs to a VPN.
Frequently Asked Question – VPC Using VPN Software
Yes, with some configuration, you can easily connect your VPC to a software VPN.
Although all steps are necessary for connecting a VPC to a VPN, providing a Name Tag is important. Without an appropriate name tag, your VPC cannot be connected to the VPN.